Your First DrawnUI App: C# Fluent Syntax
Learn how to build your first DrawnUI app using pure C# with fluent syntax - no XAML required! This tutorial shows you how to create the same beautiful UI from the XAML version but using DrawnUI's powerful fluent API with hot reload support.
Host support
The control tree and fluent composition patterns in this article are shared DrawnUI concepts, but the page shell shown below is still MAUI-first.
In Blazor, initialize DrawnUI with
UseDrawnUiAsync(...)and host the sameSkiaControltree inside a RazorCanvascomponent instead of a MAUIContentPage.
Blazor host equivalent
For Blazor WebAssembly, the minimal hosting pattern looks like this:
var host = await builder.UseDrawnUiAsync(new DrawnUiStartupSettings
{
    UseDesktopKeyboard = true
});

await host.RunAsync();
<Canvas WidthRequest="400"
        HeightRequest="220"
        BackgroundColor="#F4F1E8"
        Content="@RootControl" />

@code {
    private readonly SkiaControl RootControl = CreateMainLayout();
}
The current Blazor sandbox reference route for this tutorial concept is tutorial-first-app.
🚀 Live Demo in Tutorials Project
Want to see this in action first? Check out the DrawnUI Tutorials Project for:
- First App (Code) - This tutorial in action
- First App (XAML) - Same UI built with XAML
- Interactive Cards (Code) - Advanced fluent C# patterns
- Custom Controls - Game-style interactive buttons
- News Feed Tutorial - Advanced scrolling lists
Clone the repo and run the Tutorials project to explore all examples!
🎯 What We'll Build
A simple interactive app featuring:
- 🖼️ Display Logo with proper image handling
- 📝 Styled text labels with different fonts and colors
- 🎮 Interactive button with animations
- 🔄 Hot reload support for rapid development
- 👀 Property observation for reactive UI updates
🛠️ Step-by-Step Implementation
1. 📱 Setup Your Page Class
Create a new page that inherits from BasePageReloadable for hot reload support:
using DrawnUi.Views;

namespace MyFirstDrawnApp;

public partial class MainPageCode : BasePageReloadable, IDisposable
{
    Canvas Canvas;
    private int clickCount = 0;
    private SkiaButton btnClickMe;

    public MainPageCode()
    {
        Title = "First App Tutorial (Code)";
        BackgroundColor = Color.Parse("#f5f5f5");
    }
}
2. 🏗️ Build Method with Hot Reload
The Build() method is called by .NET Hot Reload and when the page loads:
/// <summary>
/// Will be called by .NET HotReload
/// </summary>
public override void Build()
{
    Canvas?.Dispose();

    Canvas = new Canvas()
    {
        RenderingMode = RenderingModeType.Accelerated,
        Gestures = GesturesMode.Enabled,
        VerticalOptions = LayoutOptions.Fill,
        HorizontalOptions = LayoutOptions.Fill,
        BackgroundColor = Color.Parse("#f5f5f5"),
        Content = CreateMainLayout()
    };

    Content = new Grid() //due to maui layout specifics we are forced to use a Grid as root wrapper
    {
        HorizontalOptions = LayoutOptions.Fill,
        VerticalOptions = LayoutOptions.Fill,
        Children = { Canvas }
    };
}
3. 🎨 Create the Main Layout
Build your UI using fluent C# syntax:
SkiaLayout CreateMainLayout()
{
return new SkiaLayout()
{
Type = LayoutType.Column,
HorizontalOptions = LayoutOptions.Center,
Padding = new Thickness(40),
Spacing = 16,
UseCache = SkiaCacheType.Operations,
VerticalOptions = LayoutOptions.Center,
Children =
{
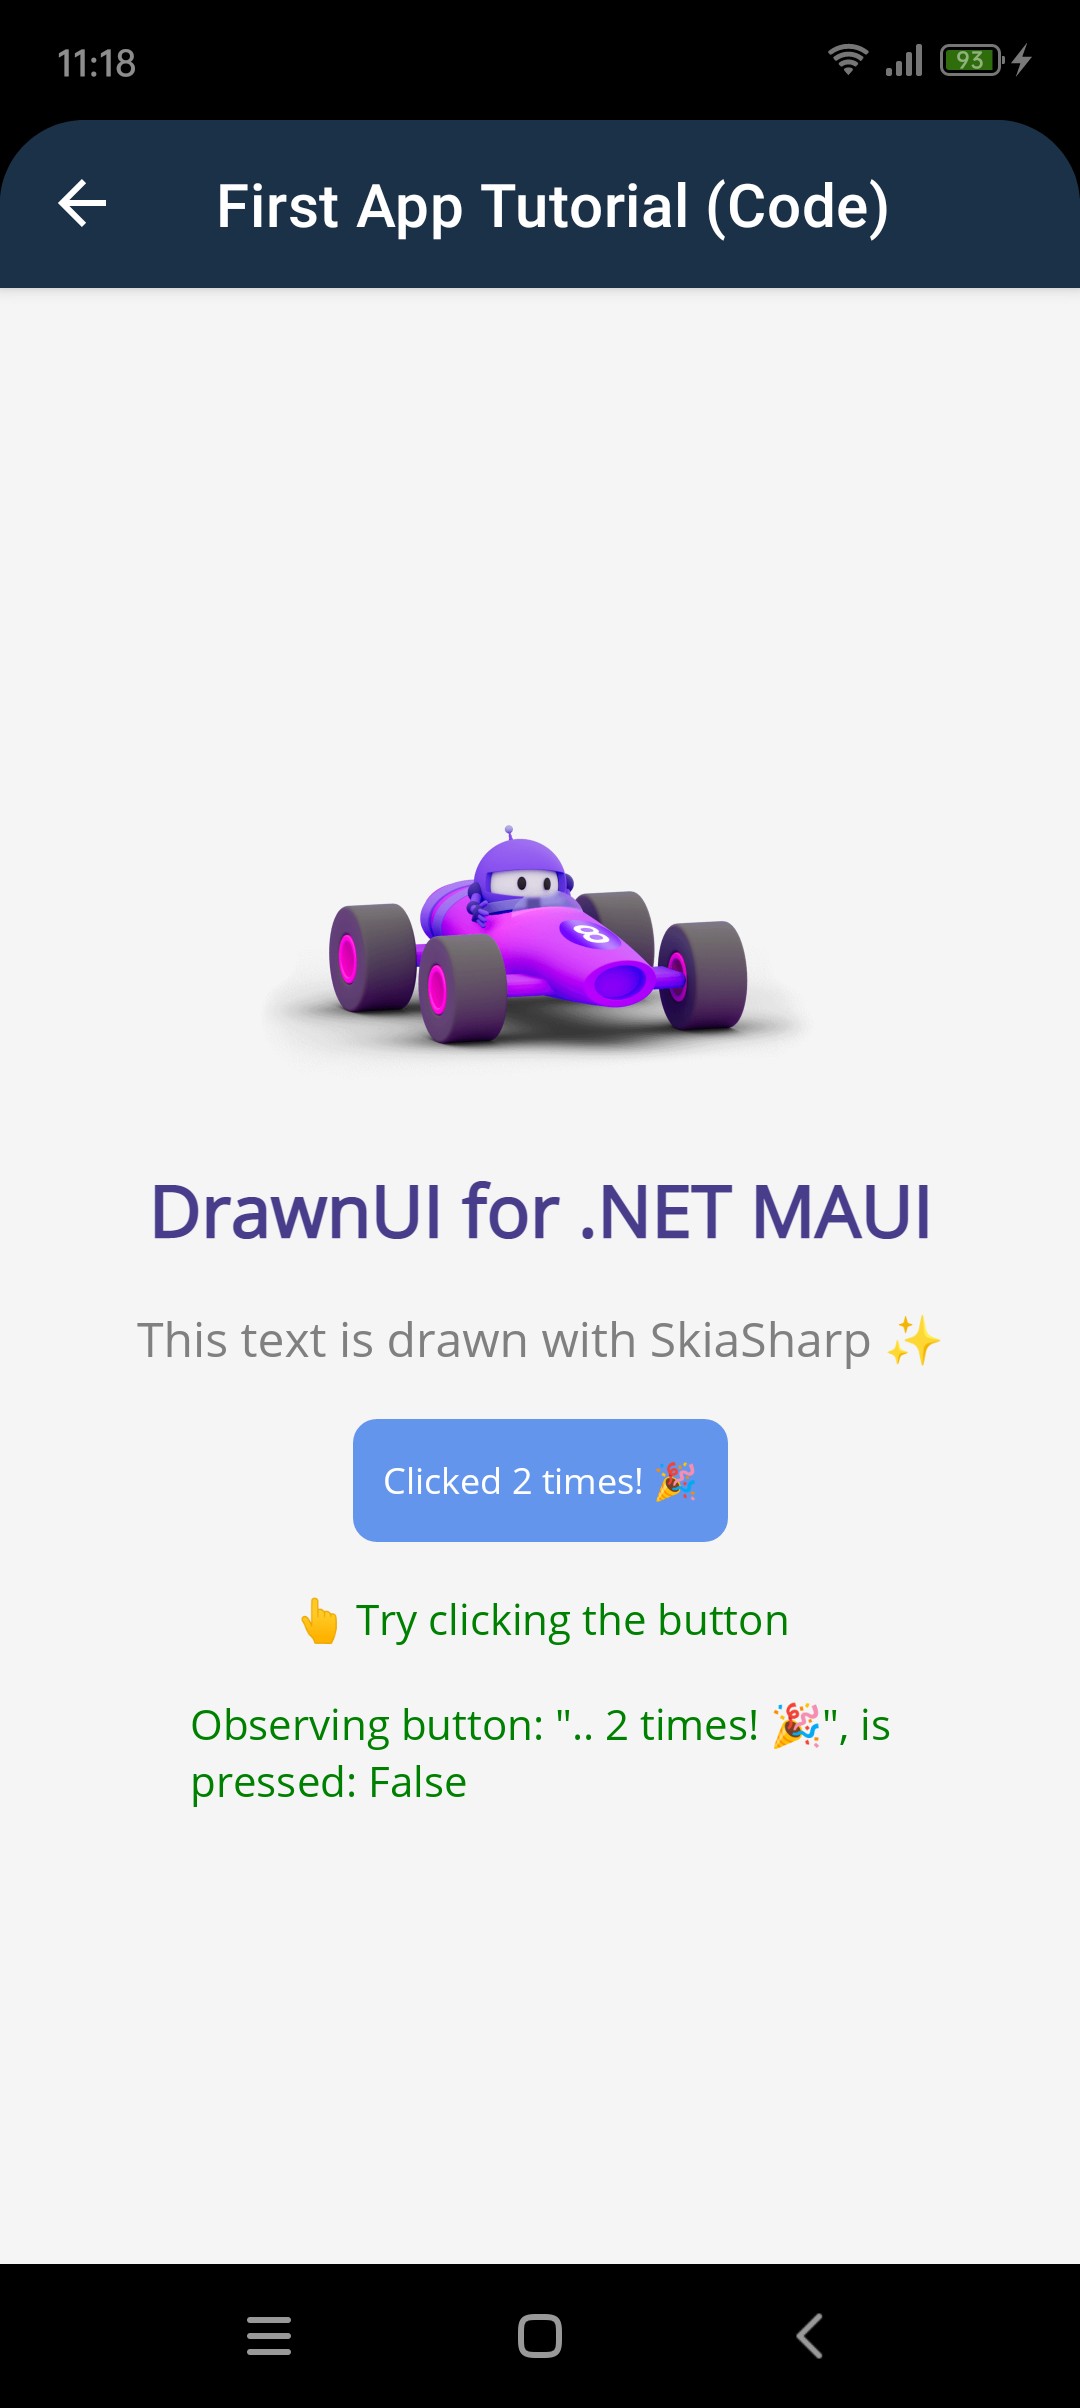
// DrawnUI Logo
new SkiaImage()
{
UseCache = SkiaCacheType.Image,
Aspect = TransformAspect.AspectFit,
WidthRequest = 200,
Source = @"Images\dotnetbotcar.png",
HorizontalOptions = LayoutOptions.Center,
},
// Main Title
new SkiaLabel("DrawnUI for .NET MAUI")
{
UseCache = SkiaCacheType.Operations,
FontSize = 24,
FontAttributes = FontAttributes.Bold,
TextColor = Colors.DarkSlateBlue,
HorizontalTextAlignment = DrawTextAlignment.Center,
HorizontalOptions = LayoutOptions.Center,
},
// Subtitle with emoji
new SkiaRichLabel("This text is drawn with SkiaSharp ✨")
{
UseCache = SkiaCacheType.Operations,
HorizontalTextAlignment = DrawTextAlignment.Center,
FontSize = 16,
TextColor = Colors.Gray,
HorizontalOptions = LayoutOptions.Center,
},
// Interactive Button
CreateInteractiveButton(),
// Instruction Label
new SkiaRichLabel()
{
UseCache = SkiaCacheType.Operations,
Text = "👆 Try clicking the button",
FontSize = 14,
TextColor = Colors.Green,
HorizontalOptions = LayoutOptions.Center,
},
// Property Observer Label
CreateObserverLabel()
}
};
}
4. 🎮 Interactive Button with Fluent Gestures
Create a button with fluent gesture handling:
SkiaButton CreateInteractiveButton()
{
    return new SkiaButton("Click Me!")
    {
        UseCache = SkiaCacheType.Image,
        BackgroundColor = Colors.CornflowerBlue,
        TextColor = Colors.White,
        CornerRadius = 8,
        HorizontalOptions = LayoutOptions.Center,
    }
    .Assign(out btnClickMe)
    .OnTapped(async me =>
    {
        clickCount++;
        me.Text = $"Clicked {clickCount} times! 🎉";
        await me.ScaleToAsync(1.1, 1.1, 100);
        await me.ScaleToAsync(1, 1, 100);
    });
}
5. 👀 Property Observation for Reactive UI
Create a label that automatically updates when button properties change:
SkiaRichLabel CreateObserverLabel()
{
    return new SkiaRichLabel()
    {
        UseCache = SkiaCacheType.Operations,
        FontSize = 14,
        TextColor = Colors.Green,
        HorizontalOptions = LayoutOptions.Center,
    }
    .ObserveProperties(() => btnClickMe,
        [nameof(SkiaButton.Text), nameof(SkiaButton.IsPressed)],
        me =>
        {
            me.Text = $"Observing button: \"..{btnClickMe.Text.Right(12)}\", is pressed: {btnClickMe.IsPressed}";
        });
}
6. 🧹 Proper Disposal
Implement proper cleanup for memory management:
protected override void Dispose(bool isDisposing)
{
    if (isDisposing)
    {
        this.Content = null;
        Canvas?.Dispose();
    }
    base.Dispose(isDisposing);
}
Now let's wrap it inside a Canvas to be used inside a usual MAUI app - that's all you need to integrate this fluent C# approach into any existing MAUI project!
🎨 Understanding the Fluent Patterns
Key Fluent Methods
.Assign(out variable)
new SkiaButton("Click Me!").Assign(out btnClickMe)
Assigns the control to a variable for later reference while continuing the fluent chain.
.OnTapped(action)
button.OnTapped(async me => {
    // Handle tap with direct access to the control
})
.ObserveProperties()
label.ObserveProperties(() => btnClickMe,
    [nameof(SkiaButton.Text)],
    me => { /* Update logic */ })
Constructor Text Parameters
new SkiaLabel("Text content")  // Direct text in constructor
new SkiaButton("Button text")  // Cleaner than setting Text property
Hot Reload Benefits
- Instant UI updates when you modify the
Build()method - Proper disposal of previous UI elements
- State preservation of class-level variables
- Faster development cycle
🚀 Advanced Features Demonstrated
1. Property Observation
The observer label automatically updates when button properties change, demonstrating reactive UI patterns.
2. Fluent Gesture Handling
Direct gesture handling with .OnTapped() instead of separate event handlers.
3. Memory Management
Proper disposal pattern with Canvas?.Dispose() for memory efficiency.
4. Hot Reload Support
BasePageReloadable enables instant UI updates during development.
💡 Performance Tips
- Use Caching:
UseCache = SkiaCacheType.Imagefor complex visuals - Cache Text:
UseCache = SkiaCacheType.Operationsfor labels - Dispose Properly: Always dispose Canvas in hot reload scenarios
- Assign References: Use
.Assign(out var)for controls you'll modify
🎯 What You've Learned
- Fluent C# Syntax: Building UI with method chaining
- Hot Reload Integration: Rapid development with instant updates
- Property Observation: Reactive UI patterns
- Gesture Handling: Direct event handling with fluent syntax
- Memory Management: Proper disposal in hot reload scenarios
🚀 Next Steps
Try experimenting with:
- Complex layouts with nested fluent chains
- Custom animations with different easing curves
- Data binding with ObservableCollections
- Custom controls using fluent patterns
The fluent C# approach with hot reload makes building DrawnUI apps both powerful and enjoyable! 🎨